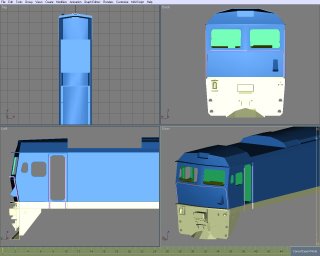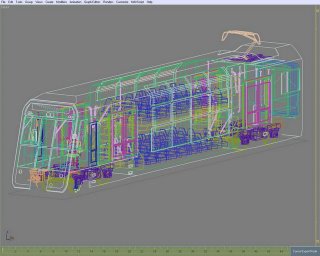
I released the buffers recently, despite not being 100% happy with them. I had thought about releasing a scripted buffer that would allow the placement of the light (left, right, center, none) via surveyor, but it seemed too hard for what it was. I also wasnt happy with the textures, but they had been sitting around for a while, so I thought they were better out there, than on my hard drive.
I hope to update them soon, fixing the textures, and adding a parameter which should make them actually stop slow moving trains. I have to admit, Ive read the CCG many times, but this hadnt stood out. It makes sense, since without such a parameter, Trainz has no way of telling a buffer from any other trackside object. For the moment, this feature is broken in TRS2K6, so it wont matter until after SP1 is released (unless you have 2K4).
I spent last weekend mainly researching other projects which have caught my attention. I wasnt making much progress with the Tangara texturing, so it was a welcome break. Above is a screenshot I grabbed a couple of weeks ago, and meant to post here at some point. Today is as good a day as any.
There has been some discussion on the Trainz forums recently about Japanese trains and routes, with a few new items being worked on. This is something close to my heart, since my wife is Japanese, and we have close ties to Japan. Much like my reasons for building NSW trains, I'd love to build some Japanese ones too, since there is virtually nothing available to date.
Yes, I know about the two Shinkansen (Bullet Trains) on TrainzLuvr, but those are a few cars short of a train set, and have other problems as well. There are also two 500 Series Shinkansen on the DLS by Tesla and Votkov. The one by Votkov looks promising but I havnt tried it yet. If I can repair the faults reported by 2K6, it may be the only one which is complete.
Japan has a rich variety of trains, from steam to single car diesel railcars, to freight, to the latest and most sophisticated EMU sets (There are around 14 different series of Shinkansen alone, since the original Bullet Train started in 1964). Add to that the awesome and wildly varying scenery, and its a no-brainer. It has to be one of the best countries for railfans to model - hands down. Japan is built on rail. There are rail lines everywhere! Do yourself a favour and take a look.
So why is there nothing available for Trainz?? Well, I thought about that while I was looking for somewhere to run the Shinkansen I was testing. There arent a lot of routes to run a 320 meter train which travels at 300km/hour. There certainly arent any Japanese routes or Shikansen lines on the DLS. I think the biggest obstacle to route builders is the lack of Japanese buildings, scenery, and textures. Regardless of whether Auran thought about marketing Trainz to Japan or not, it would be pretty difficult to do so without Japanese content and without a lot of Japanese creators on board, the content hasnt appeared. Its a catch 22.
Well, the flow of content is starting to trickle in the form of rollingstock, but that still leaves us without any routes to run it on. There have been a few attempts at a Japanese route, but these havnt looked the part, since every building, sign, signal, and station has had to be substituted with an existing US, European, or Australian model. Unfortunately, if it doesnt look the part, its not much different to whats already available, but Its a good effort, and we have to start somewhere.
We have to give our route builders a leg-up. They need scenery to work with, so while I have my hands full modelling local content, Ive started to collect photos and other useful research material from the web, including some really good finds. I have SRTM data from Tokyo to Osaka, (and more on the way) and have thought about building the Tokaido Shinkansen line, but its a huge project (500km from end to end, including that classic scene of Mt Fuji) and unfortunately its not something I have time for right now. I estimate it would be over 1000 base boards, but it would be SO worth it. (Yes, 1000+ its possible - check the forums).
For now, the research and data is here, but this will have to wait. I may knock out a traditional house, or a Japanese advertising sign, a prefecture castle, or a temple occasionally. I'd love to see a group form who could focus on Japanese content, but I have a few local things to do first before I can start one - any takers?
Wednesday, June 21, 2006
Sunday, June 18, 2006
Wooden Buffers Uploaded
Ive uploaded two versions of the buffer stops to the DLS, one lit, and one without a light. The unlit one had to be uploaded again so it may take a little longer to get to the DLS. Look for them in a couple of days. Compatible with TRS2004 and above.
Train Stops Updated
Ive just uploaded an updated version of the Train Stops to the DLS. This update fixes a problem with the stops being in an unknown state until the signal has changed at least once. The revised version now properly syncs itself to the signal, and will appear in the right position (up or down) when the route is first loaded. Allow a couple of days for it to pass through the approval process. Compatible with TRS2004 and above.
Monday, June 12, 2006
Tangara Progress
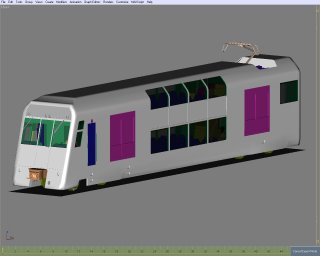
Ive started texturing the Tangara. As you can see I havnt done much. so far I have been experimenting and trying to figure out how to break it up into smaller chunks for mapping. Unless youve read my earlier posts, you might not realise that this is my first major Gmax creation, so I am still figureing out how to best apply complex textures.
All the tweaking of the model is done. Ive finished the drivers cab (except for the detailed "cab mode" view), and Ive finished the Train Stop trip arm, thanks to the photos I took recently. The only part of the model that still needs to be finished is the intercar gangway.
I started on the gangway again, and had it all figured out. I was making progress, and then Gmax crashed, so its back to its original form and I will do it again later when I have time. I did try to save my work, but ended up with an unreadable file, so if you're not using versioned saves (and from all the "I lost my gmax file" forum posts, I know that many arent) you should be! It took me all of 30 seconds to recover the previous save, and I only lost a few minutes work.
Back to the texturing... I textured the windows first, and thought I'd be clever and tint them in Gmax without using a texture file (thus saving resources), but apparently the Trainz exporter requires all surfaces to have a UVW map, which implies a texture file, so I will see what I can figure out. The dark windows look darker in this picture due to the angle and specular lighting. They're not so dark on the model, and the specular lighting makes them shine, even in Gmax's simple viewport rendering.
So far, the body is covered in a simple white texture, and I am now trying to select areas to create the UVW maps. Figuring out the mappings is difficult, but Im getting there. Ive reduced the number of visible edges so that I can select whole areas as a single polygon. This helps me set up the UVW mapping, and as I get the areas selected, I assign a material ID to them. Once I have the body mapped out, I'll edit the texture file to add some detail.
Im going to use Lithunwrap to create a bitmap showing the UVW mapping, and will convert that to a TGA and then finally use The Gimp to draw in some detail. Ive seen tutorials that suggest using a screen shot as the bitmap, but to me that approach lacks finesse. While my approach involves a lot of messy exporting and file conversion, I will end up with texture files that map directly to the pixel!! You cant get much better than that.
On another subject, Ive been struggling with what to do about poly counts. I like to post them here as it shows progress as the model gets more complex, but I dont want to scare people off, since there are usually more polys in the work-in-progress than will be in the finished model. Estimating the final count was not working - from week to week, I couldnt remember what I had included in previous counts, and what I hadnt.
I decided to not post poly counts, but felt that the posts had lost that progress indicator, and then I read some comments from PaulHobbs who said something along the lines of: "Beware creators who wont tell you the poly count of their models", and I agree, so I have decided to post the in-progress count, as displayed by the Gmax poly counter, along with a disclaimer which hopefully explains the situation. Ive set this up as a template so it should become fairly standard.
I havnt added thousands of polys since the last count (ok... maybe one thousand) - Ive just stopped subtracting all the bits that will be separated or excluded from the main in-game model when its exported.
File Version: 369
Poly Count: 18139
Note: The poly count shown here is for the gmax model in progress. The count will generally be higher than that of the finished in-game model since it includes various tools and other pieces which may not be part of the final model. LOD moddelling will be used to further reduce in-game polygons.
Wednesday, June 07, 2006
Quick 86 Class update
While the Tangara is my favourite EMU, the 86 Class is my favourite locomotive, and I just cant keep away from it - no matter how I try to finish the Tangara... besides I need a break every now and again from one model, so I work on the other for a while.
Ive gone back to the outside, and left the fridge and interior back wall for later. Ive detailed around the doors and added a few hand rails, which still need to be tweaked a little - especially the one at the front, which needs a few polys removed - I figure I can get rid of about 80 polys without making it look any different, but its a painstaking process of eliminating verticies one by one. Does anyone know an easy way of removing redundant verts without deforming the mesh - kind of like a reverse "Mesh Smooth" ? I certainly havnt found it in Gmax yet.
Ive finally decided that the 86 will be payware, which means I have to finish off the web site that I have been playing around with so far - at least theres no rush, it will be a while before the 86 is finished. I havnt decided on the price yet, but it will be no more than five bucks. Just so as you know.
File Version: 72
Monday, June 05, 2006
Tangara Progress
Ive been getting the base model ready for texturing and tweaking a few things here and there. As I mentioned last week, Ive been having a closer look at the drivers cabin and have noticed quite a lot of detail that I missed - mainly in the structure of the walls and ceiling, so I have been getting that right.
Ive lowered the ceiling and added the fluro lights that run across the back wall. Ive fixed the area above the doors, and have added the recess for the fire extinguisher. I just have to finish the ceiling at the front, which has some kind of overhead console, or equipment box which will give me the right shape on which to lay the textures.
Ive removed a few textures that came along with some of the imported pieces (such as Auran's driver's chair and extinguisher from the DD40) and deleted all the materials from the navigator so that I can start fresh. During this process of tweaking, theres not really a lot to see as things get moved around only slightly. It doesnt really look that different, but it will make the finished model a much cleaner base to start from.
While I was at HET on Saturday I managed to get some detailed close up photos of a Train Stop trip arm, and this has helped me figure out how best to build it, so that will be done soon. I also got some photos of an actual drivers chair, complete with HMC printed on the fabric (Hornsby Maintenance Center) so I will be using that as the texture for a more realistic look. I spent the rest of the day cleaning and vacuming F1 (an old manual door red rattler set) to get it ready for a trip in a few weeks time.
Ive also figured out how the gangway should work, so thats another thing to finish. The texturing should start soon, but I am waiting until Im happier with the model. Theres no point texturing if Im going to start deleting things and replacing them with new pieces - I'd have to texture them over again.
For those who arent sure of the plan, once this model of the control trailer is finished and textured, I will be using it as a base to create 9 more models which will make up the completed project. Theres 2 cars for the T set, 3 cars for the G set, and 2 for the 4D, plus another 2 cars to build the stripped 4D that I mentioned in an earlier post. As you can see, its important to get this one right before I start copying it to build the others - if for example the gangway isnt right, I will have to edit 14 of them to correct the problem, rather than just one. Thats why Im taking my time, and tweaking this model until Im happy with it. It should be fairly quick to build the other models once this one is ready - just a matter of highlighting a few difference between the various types of carriage.
Ive given up on inlcuding the poly count in these posts. Due to the way Im building the model (with eveything in one file for now) the count doesnt really add up the way Auran break it down, and I really cant be bothered subtractracting all the pieces that wont be in the final model - in fact ive forgotten which counts include what, which makes comparing them difficult.
File Version: 362
Subscribe to:
Posts (Atom)