I've uploaded new versions of the NSW Wooden Buffers to the DLS, and they should be available soon. The good news is the flicker is Totally Gone!... the bad news is I couldn't get my new arrangement of the lamp working the way I wanted, so I went back to the old way (Two separate models). I'd eventually like to script it and have just a single model portray both versions, with the lamp activated or hidden by a script, but that's a low priority right now.
I had a look at the NSW Train Stop (and the UK one I also did) but cant see whats wrong with it. In TS2009, the script seems like it isnt running at all. Weird. I noticed that someone else has "fixed" the Train Stops as there is a new version on the DLS, unfortunately I cant download anything due to the servers being busy. Its so annoying to not be able to retrieve a copy of your own content.
Anyway, when I get the updated Train Stop, I'll first see if I can fix its Trainz Build. These were intended for TRS2006, but someone has set it up for TC or above. Then I'll see if I can figure out why the script isn't running. Strangely enough, the object I modelled the script from, still runs fine with its original script.
I don't have any pics right now, but Ive spent some time texturing the 86 Class. Its *so* close to being ready for export, but there is a lot of work to be done after that (scripting) so dont think that means its due for release any time soon. I have the body about 70% textured, with just the small fiddly bits left to map. Once its in Trainz, I can concentrate on the Tangara while I start putting the scripts together.
The 86 Class and Tangara will share much of the script (They're both Electric Multiple Units, so share similar functions) so both models will benefit. I expect the 86 Class will be on my test track for some time, while it gets all its scripting and other planned goodies. I anticipate the Tangara will be ready before it.
With the Tangara, Ive been thinking its time to upgrade it to 3DS Max. It was originally intended for TRS2006, but here we are at TS12. I still have to catch up on my Trainz versions but I will get TS12 as soon as I can and probably aim the Tangara at TS2009 now. At this stage, I havent started to convert it, but I have a fairly good process for exporting from Gmax to 3DS Max, so when I get started that part of it shouldnt take long.
I'll see if I can have some pictures of the latest work ready for next time.
Showing posts with label Textures. Show all posts
Showing posts with label Textures. Show all posts
Tuesday, June 14, 2011

Friday, March 20, 2009
Tangara Progress
 Progress on the Tangara has been slow, so I've been holding off on writing an update here. Now I have some other things to say, so Im posting this to get it out of the way :)
First, let me say that I have been working on some fiddly bits, re-arranging vertices by hand, in order to assist with the texture mapping, so there has been a lot of work, but very little to show for it.
I've found that its much better to create a "hard" line (for example around the driver's window, or the cab door) at the edge of a polygon, rather than trying to draw the line on a texture. The Tangara is 20 metres long and almost 5 metres high, and all that has to fit onto a couple of texture bitmaps. I have been using 512 x 512 pixel texture images, but even at double that size, one pixel is still equal to several centimetres on the side of the Tangara. The end result is, that if I draw a solid line on the texture, at any sort of angle, it has a jagged, pixelated edge. Not so on a polygon boundry - the edge is smooth and sharp!
So, I have added a few polygons by cutting an area around the driver's window, which gives the sharp lines that I'm looking for. I also added exterior sills to all of the windows, to allow me to texture the sill area in black. Previously the sills were part of the interior, which will be white, and getting the sharp dividing line between the outside and the inside (between black and white), and getting it in exactly the right place, (since the windows are only about 1cm thick) would be difficult on a texture. Cutting the mesh gets the location right, and gives a nice sharp line.
I tried simply painting the texture around the guard's door, since it is at a 90 degree angle, but I have found that with the resolution of the texture images, the line along the top and bottom falls mid-pixel, so I would have to slide the texture map up or down a bit. Its just easier to cut around the door, and have it be consistent with everything else, so that is the way I am going to go.
File Version: 400
Poly Count: 13,325
Bogies and pantograph have been exported to seperate files for texturing
Note: The poly count shown here is for the Gmax model in progress. The count will generally be higher than that of the finished in-game model since it includes duplication, tools, jigs, and other pieces which may not be part of the final model. It may also include parts which are generally counted separately, such as pantographs, interiors, or bogies. LOD modelling will be used to further reduce in-game polygons.

Saturday, March 14, 2009
86 Class Update
 Ive spent most of the last couple of weeks working on the 86 Class. This is the one that has been tearing at me to be finished, so I needed to make some progress on it. I've done a lot, and now that it’s ready to be texture mapped, I can leave it for a while and catch up on the Tangara too.
I finished off the body detail, headlights, marker lights, side mirrors, windows etc, and cleaned up the roof, then mirrored the body and base to create the other end of the loco. I started on the low res interior next. This is the one that will be seen in DCC mode, from outside the train (through the doors or windows). Technically, its part of the body, but I'm keeping it separate for now. I isolated parts of it that would have detailed textures, and then used a micro texture to map out the general colouring on the rest.
A micro texture is a 32x32 bitmap with 16 colour squares on it (4x4 each). Using detailed textures only where they are needed and micro textures for everything else greatly reduces the amount of memory required by the graphics card to hold all of the textures.
 I added all the under-frame gear - compressors, motor-alternator, main reservoir, etc and joined the body and base together, then hand optimised it to get it ready for texturing. I also added the Comeng builder's plates and will texture them separately later. At this point, I built the bogies and moved them off to their own file, ready to be imported into Trainz. The pantograph has also been finished and is ready to import.
The horns had been on my hit list for a while now. They started as a single horn from the Art Source CD, which I used to create a basic set of 5 horns for the 86 Class, but they are very high poly. I finally got around to fixing them and mounting them properly. I took over 1800 polys out of the horns alone!! (900 each end)
I did some fine tuning of the low res interior texture mapping, and then went back to the high res one (for Cab Mode) and cut holes in the drivers desk for the gauges and indicators. I had been leaving that until last since the boolean (cutting) tool always tries to optimise the mesh but usually ends up doing more damage than good. To avoid that, I detached the face of the panel before I cut, limiting the damage just to that area, and then hand optimised and repaired it before re-attaching it to the interior.
 As a final touch, I added the Auran Fire Extinguisher in the appropriate place. I’m going to make that a trade mark - each of my cabs will have an Auran fire extinguisher somewhere :)
Now that I’ve mirrored the two halves of the loco and added al the asymmetric detail, the poly count has doubled, as expected. My previous post deals with that. Also check out my Flickr sets by clicking on the slide show to the right… I’m uploading screenshots there as I go.
Overall, there was quite a lot of work in this update, and now that its done, I’m ready for a change, so its back to the Tangara for a while. I’ve learnt a lot while doing the 86 Class, and have used different techniques in places, and these will be transferred to the Tangara so that both models will benefit.
File Version: 150
Poly Count: 22,900
Note: The poly count shown here is for the Gmax model in progress. The count will generally be higher than that of the finished in-game model since it includes duplication, tools, jigs, and other pieces which may not be part of the final model. It may also include parts which are generally counted separately, such as pantographs, interiors, or bogies. LOD modelling will be used to further reduce in-game polygons.
Monday, March 02, 2009
Tangara Progress

So, after something like 30 attempts (seriously, probably more), I finally got the body texture mapped in a way that Im comfortable with. Did I mention that I hate doing textures? Im sure I have.
I spent a lot of time getting to know Gmax again. At first I couldnt even remember how to scroll the camera around. Once I figured that out, I quickly re-did a couple of tutorials to get reacquainted with the process, and spent a bit of time just scrolling around, looking at the model from all angles to get familiar with it again. It took a while to be brave enough to start manipulating verticies - I didnt want to break anything!
Luckily the Tangara was in the midst of texturing, so there was something I could do, without having to mess with the actual geometry. Even so, eventually, I did start tweaking a few things, and correcting a few little problems that I found. Ive always hated the texturing part. Its tedious, and there are so many faces to do. Even a simple cube has 6 sides which each need to be mapped to a material and then UVW mapped to a texture. The Tangara is a little more complex than a cube.
When I left it, I had been experimenting with a technique that involved using Lithunwrap to paint the texture map onto a texture file. It really seems to me that once you have your surfaces UVW mapped, you should simply be able to export that to an image file and begin to fill in the colours and detail. Alas, Gmax doesnt have such a feature, but Lithunwrap does. The problem is that with the limited file formats supported by both Gmax and Lithunwrap, you have to first export the model into a 3DS file so that Lithunwrap will read it. This was causing a few problems, with the conversion process warping the model out of shape in some places. Also, this is a one way process so you cant make use of Lithunwrap's UVW mapping tools. Its only purpose in this case is to simply convert the Gmax UVW maps to an image.
Finally, after a few problems, I decided not to use Lithunwrap to create my bitmaps. Instead, Im using a less accurate method used by a lot of Gmax users, which is simply to take a screenshot of the texture map after you have laid it out, and then use photoshop or similar software to save it as an image. This is a lot less accurate and doesnt produce the cleanest bitmaps, but at least it works and I dont have to convert the model to another format and export a piece at a time.
The picture above is a mix of a simple plain texture, and a screenshot based texture with some text on it. I just knocked it up quickly to test, and to be sure that the lettering was facing in the correct direction on each side. You can see the UVW mapping as blue lines on the front of the Tangara. Ive roughly painted over it on the sides, using a grey that I derived from actual photos (just to see how it looked) . At this stage I havnt started to work on the texture files, which is when all the details will be added, but at least I have the maps laid out onto the first of several texture files which I can work with. Next I will have to tackle the interior and map that.
Once I got to this point, I needed a break so Ive been working on the 86 Class a bit (See below). Gmax is all coming back to me now, and I even managed to cut the windows out of the 86 Class doors using a boolean tool, entirely from memory. Ive also discovered a few new tools that I hadnt used before, thanks to some of the tutorial videos I have been watching. This will make things easier in the future.
File Version: 393
Poly Count: 17629
Note: The poly count shown here is for the Gmax model in progress. The count will generally be higher than that of the finished in-game model since it includes duplication, tools, jigs, and other pieces which may not be part of the final model. It may also include parts which are generally counted separately, such as pantographs, interiors, or bogies. LOD modelling will be used to further reduce in-game polygons.
Thursday, July 27, 2006
Latest Ramblings
 Ive been working with Gmax on and off over the last couple of weeks. I havnt managed to get back in to my obsessive, every day, gmax habit that I was in before, but Im in there at least a couple of times a week recently.
Im about two thirds of the way through my side project, so thats coming along, and Ive done some more on the Tangara in the last few days. I dont have any screen shots, because not much has changed, visually.
Im still working on getting the texture mappings right for the outer body, and have been doing a bit of hand optimising while Im at it. In the last few days I shaved around 50 or 60 polys off of the body. The body itself is around 2300 polys in total, so I think thats a significant saving. It also helps with the texture mapping.
I knew textures would be the hard part. I havnt even started trying to draw in any detail - Im still trying to get the basic shapes mapped out onto the bitmaps. Ive decided to break it down a little. Originally I was trying to map the body to a single 1024 by 1024 bitmap, but Ive now broken that down into two 512 by 512 bitmaps, and will see if that helps. One thing that does help is being able to see how others have done it, so along with all the Auran samples on the Content Creation Art CDs, the side project has also helped in that department.
Im still thinking about the scripting, but that is a while off - I wont be starting on that until I have the control trailer textured so that I can export it to Trainz and test out the scripts. The other reason that it has to be textured now is that once its done, I can begin copying it to create the other cars (9 in total). Since the first one will already be textured, the copies will have most of their textures already in place, and will only need a bit of tweaking, and customisation here and there. It saves me having to go through this frustrating exercise multiple times.
Ive been collecting bits of script for months, and searching the forums for tips and tricks, such as how to tell if you are in driver or surveyor, or how to tell if you're in DCC mode or Cab mode. All of these snippets have been tucked away, and Ive found a few great example scripts which I can use a few pieces from. Many thanks to everyone who releases unencrypted scripts with their freeware - it helps newbies like me learn the tricks and see how they're implemented.
I know there is quite a long way to go. After 9 months, I really wish it was all finished, but theres many more months left to complete all of my currently active projects, and there are many more projects that I want to get started on. Its looking like I'll never get around to some of them - but that is what prioritising is for.
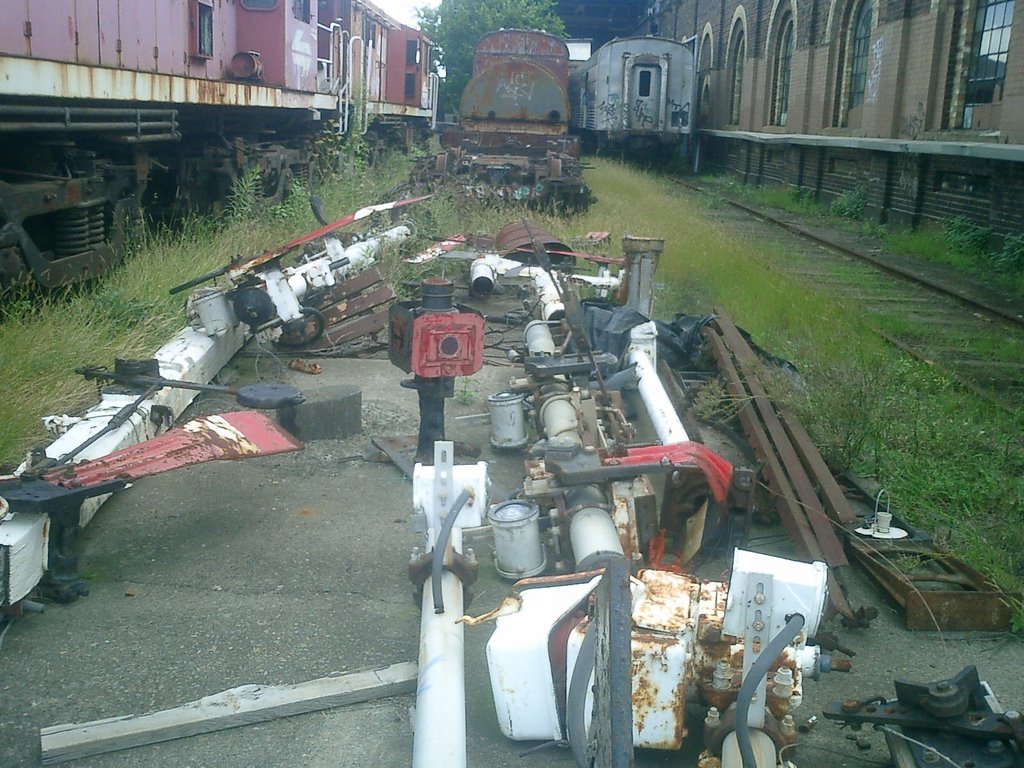
Photo: Rotten Row at Redfern
Tuesday, January 17, 2006
Progress Report
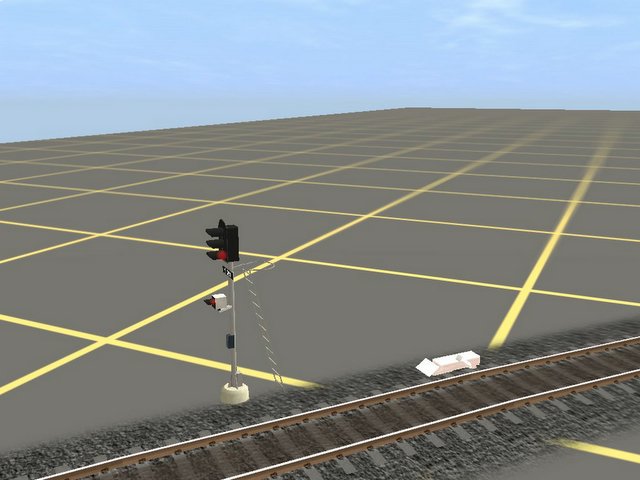 I spent some time this weekend working on the Train Stop, since a couple of people asked about it recently. The model is finished, it has a rough texture, and now, the script finally works.
Trainz Script is even more painful than making textures. It has a hundred different ways to do similar things. You have to figure out which way is the right one for your situation, and despite one method name being similar to another (ie: inferring that they are part of the same method family) they work in completely different ways!.
Take SetMeshAnimationState() for example. I was alternating between that and SetFXAnimationState() since I was not sure which was the right one to use in my situation. Both come from the MeshObject class, but they work in slightly different ways. While SetMeshAnimationState plays through the whole animation once, either forward or in reverse (which is what I wanted), SetFXAnimationState starts or stops the animation loop (which I didnt want). I originally had the animation set up as an effect, but my example script (grabbed from the forums) was using SetMeshAnimationState. Naturally this combination wasnt working. When I finally figured out I needed the FX version of the method for an effect, the animation looped (not what I had in mind). I ended up having to reconfigure the model, in order to use the SetMeshAnimationState method, which is the one I wanted to use all along.
I spent many hours figuring that out, and now finally have it working properly.
A few final steps remain before its ready for the DLS. Im dying to get my green "DLS Contributor" flag, but before I can upload it I have to tweak the model to move its origin slightly, tidy up the script to remove a few unused functions, and redo the textures.
Trainz seems to always render the textures lighter than they really are, meaning that you have to make your textures darker for them to look right. Being slightly colourblind, Im already battling with getting the textures to look right, and on top of that I have to make them look too dark in Gimp. Its never easy.
At least its one step closer to the DLS now.
No real improvements on the Tangara this week. Im three file versions ahead of where I was last week, but thats not really much of a change. The Buffer model still needs finishing, although Im already using it in a couple of routes. That shouldnt take long. I'll probably get to that after I release the Train Stop. Hopefully by the time its ready, the current problems with uploads being rejected for no apparent reason, will be fixed.
Thursday, December 15, 2005
Let there be light
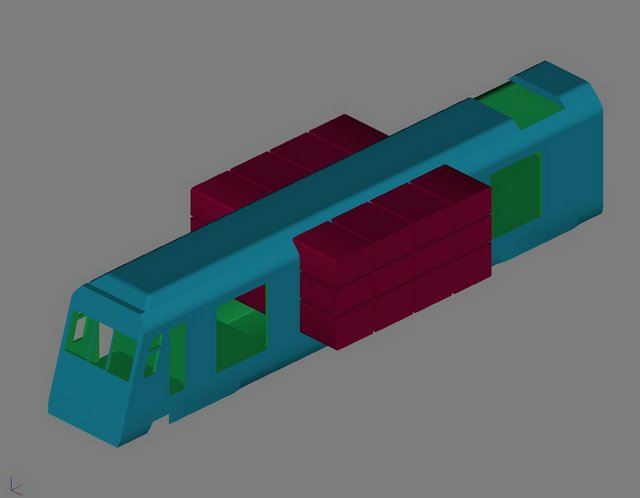 Ok, so this is really a bit of a tease. I spent a few hours tonight preparing to cut out the center windows of the Tangara. It took me ages to get each of the 12 windows and panels right. I started with a line marking the first window, converted it to an editable spline, and moved the verticies around a little. Then I made the other windows in the same row, and spent ages trying to get the size of the windows (and center panels) right, and then copied them for the other three rows. In the end, its pretty close, but not perfect without accurate measurements. Visually you shouldnt notice anything too strange, and if you do, I'll keep playing with it until you dont :)
Once I had the splines in (almost) the right places I extruded them to make the large redish blocks shown above. These were then subtracted from the body to form the holes. It was about then that I noticed a few problems. Making the windows had caused a few polygons in the roof to dissapear, as verticies were created and removed around them. This is due to the roof always having been a seperate piece in the past. Now that it is attached to the body, there is a definite edge between them. You wouldnt see this in the finished model, but it means extra polygons. I need to go back and hand-optimize the roof so that both it and the body are one single piece with polygons shared between them, rather than hard edges.
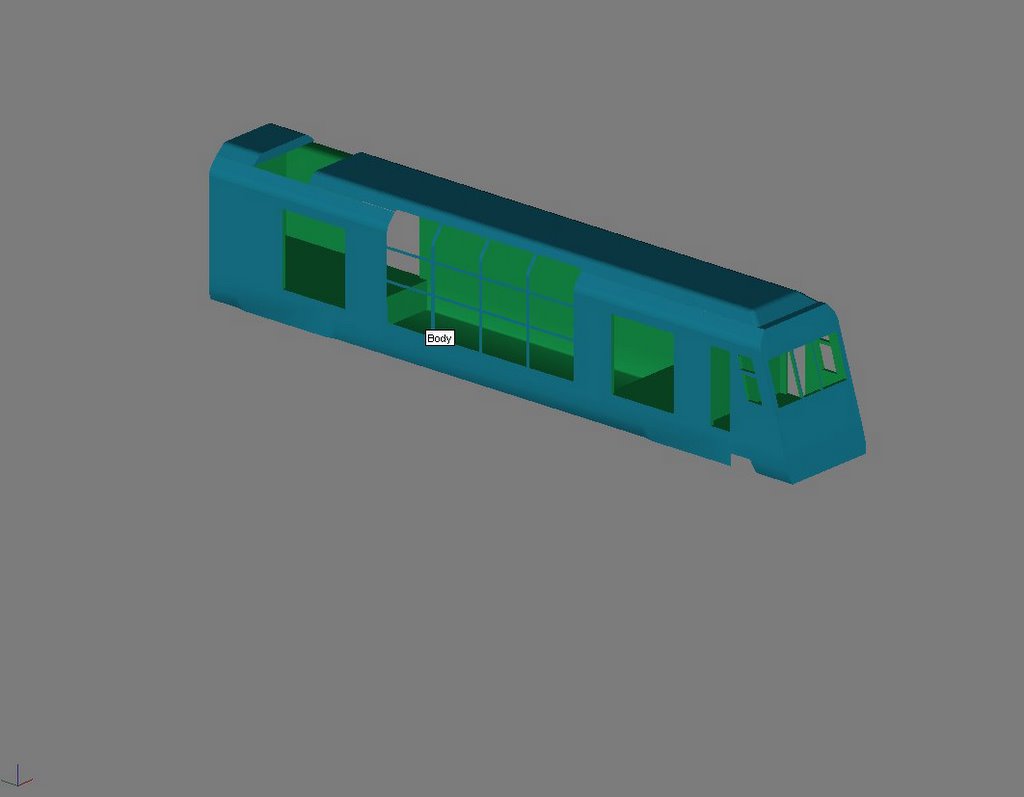 Once the body and roof are a single piece, I can go back and cut the windows again - Thats the tease. Ive backed up a couple of versions and im back to the seperate roof / no windows model, but I have all of my window blocks (including a few spares) so once I have fixed the mesh, cutting the windows out will be a snap, and with the polygons all in the right places, I wont have the problems that I had earlier. While Im doing this, the skirt has the same problem, though its not affected by the windows, but I may as well optimise it too (It will have to be done eventually). Overall, this will give a smoother finish and a few less polygons. The count really shoots up with the windows cut out, and thats not including the cuts needed for the interior windows (for looking out or through the carriage). Its still managable though.
S Set Cab
I did some more work on the S Set Cab yesterday. I'll post an updated picture soon. Ive been a busy boy. I added a few more pieces, Drivers chair, Fire Extinguisher (both from the Auran samples) as well as the data logger and crew air-con controls, and a basic dashboard panel (just the panel so far). Im still waiting on my research to arrive before I can start working on the dash properly. The only other things to do really are the Guards seat and Drivers door, before I can start on the finer detail like the hand brake and light fittings (I also have to texture it of course).
Textures
After playing around with textures and methods of texturing, I can see why a lot of Trainz objects have multiple texture files and Im starting to see where its helpful. I'll modifiy the method I have been using to include that technique, for various parts I will still use one large file (Things like the Tangara body (outside) would be one larger file). Im discovering what works, and what doesnt, as I go.
Platforms
I did a bit more research on platforms, both how to make them for Trainz, and looking for diagrams and details of the real thing on the net. Im planning on making a trip to the ARHS Research Center on Saturday (a mere 10 minute walk - lucky me!) and spending some real money on whatever useful material I can find. I have a list already of everything from stations to locomotives, and catenary (I havnt forgotten). Someone recently offered me some material covering platforms / stations, but it was in a large file. Ive been thinking about how best to deal with it. If you're reading this, I'll reply shortly.
Xmas break
Alas, its that time of the year again when everything shuts down for a few weeks. (Can you tell Im not a Xmas fan?) While I know I will keep working on things almost right up until Xmas, I also know that I will be taking some time off to spend with friends and family, and will get back to all of this some time in the new year. My wife has been very understanding of the hours (more hours than usual) that I have been spending at the computer in recent weeks. She deserves a bit of dedicated time in return. Im a geek, so Im always at a computer, but as I said, lately, its been more hours than usual. Xmas, and a few weeks after that, will be payback time.
Thats enough for now.
Tangara poly count: Was around 1500 before I backed-out. That included my cutting blocks and other non-model pieces. The body alone was 611.
Sunday, December 11, 2005
Textures are a pain
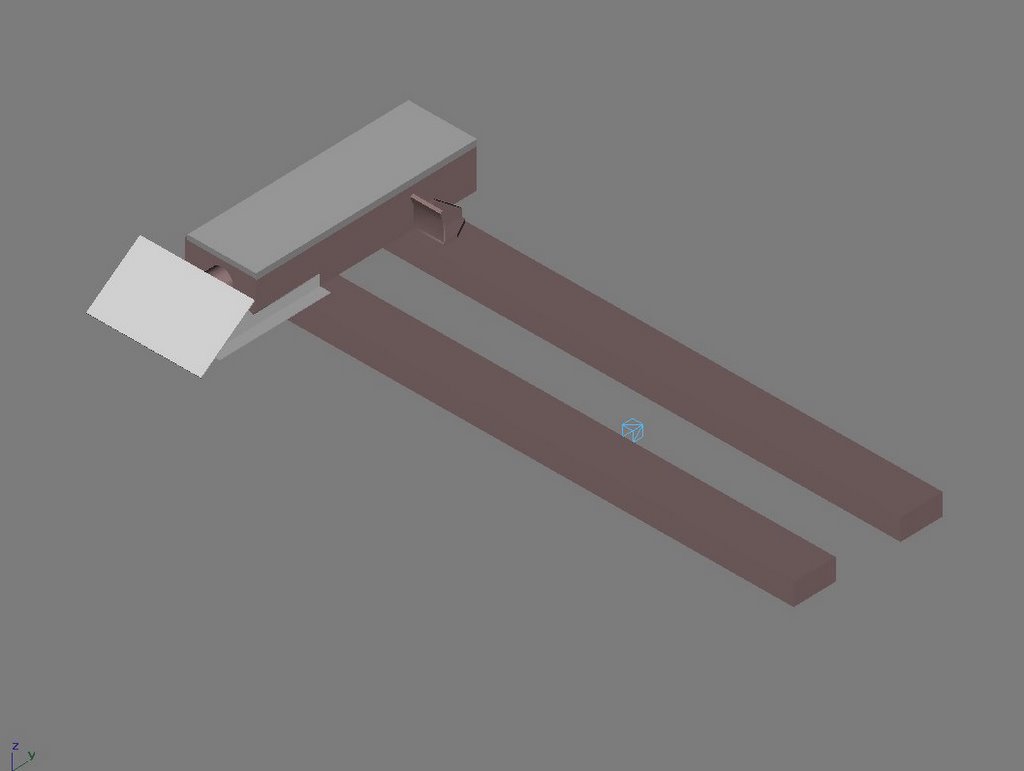 I spent last night mapping faces on the Train Stop to a texture file. I ended up with 34 faces, which to me seems like too many - especially considering they all map to the same file. Im wondering how Trainz handles that (will it keep 34 copies of the texture image in memory?). In the Flight Simulator world, the normal practice is to place all of the textures (diferent views of the plane) into one big file. That seems fairly normal to me, but the Trainz assets I have seen all seem to have multiple texture files with a few pieces in each one. The FlightSim way seems tidyer to me, so that is the approach I am taking initially.
The picture above is really rough. I threw together a basic texture image to get the mapping done. I did it a slightly different way, mapping all of the 34 faces to three different texture blocks within the file, rather than using LithUnwrap to map each face to a seperate region of the file. The picture is missing the animated trip lever, but you can see b.r.main, the small wireframe dummy that controls the animation. I will play around with the texture some more next time, but for now the hard part (the mapping) is done. I discovered a few components that will need to be mapped seperately if I want to add detail to them. I havnt mapped the trip lever yet.
Provided my wife doesnt want to drag me to the beach tomorrow or something, I should get some more done on the Tangara. Most of that time will probably be spent re-adjusting everything since Mikkk has provided some extra dimensions that I didnt have before. More work, but It has to be done.
Sleep is good.
Saturday, December 10, 2005
Computer Problems
 1 Pm
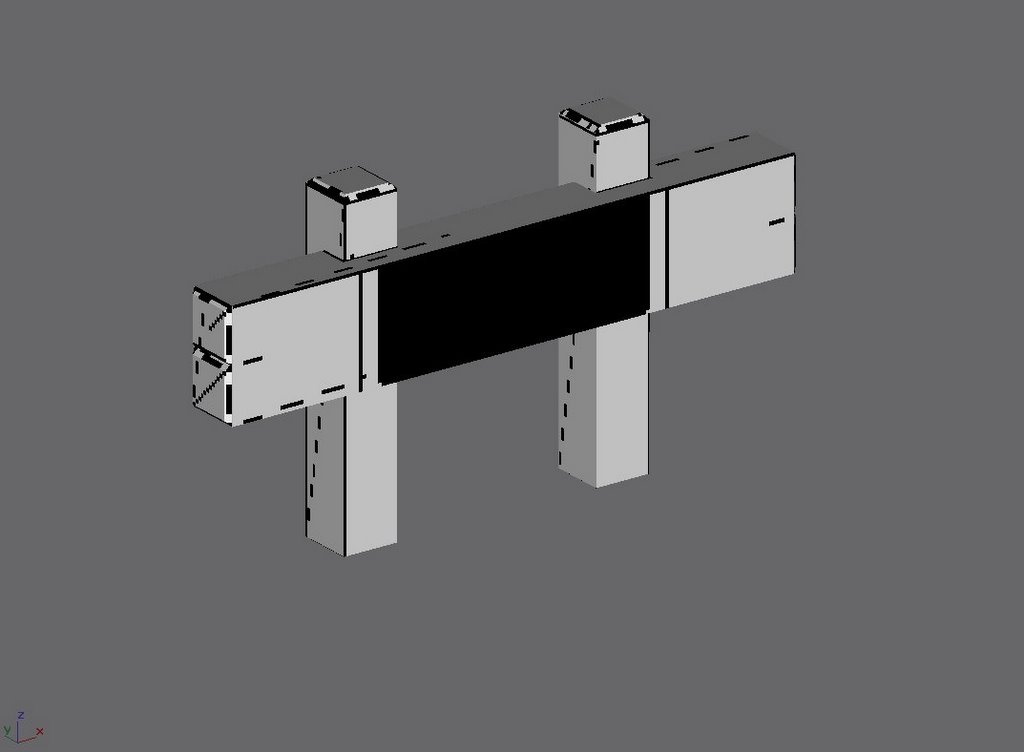
1 PmUgh! Computer problems really suck. My PC is still acting weird. Meanwhile, Ive been studying all I can about textures, and have finally found a method that works for me (Many havn't worked). Ive been trying it out on one of the Buffer Stops, since being bascially four chunks of wood, its simple and quick to build. I'll post a pic, and a bit more info, once my PC is working again. Im planning a photo-trip later today for a few more research pics.
7 Pm
I finally gave up on trying to enforce my will on my Windows PC and instead adjusted my expectations to match the reality. The PC (Both its BIOS and Windows) is now doing whatever the heck it wants, with the added emphasis that it is now at least doing something. In the end, I reverted back to its old BIOS. Windows finally co-operated after several failed reboot attempts, and came up properly. The most frustrating part is that the BIOS bug (which I am now thinking is a motherboard fault) causes a 10 minute delay during each reboot (and Ive done several today). for example, Try reversing out the new bios, flashing the backup ROM as well, and then booting windows (an attempt anyway), and theres 30 minutes of waiting time right there!
As noted above, I went for a walk earlier, after being frustrated by my PC. I took a few photos at Redfern and Central, and while I was at the Sydney Terminal part of Central, I stumbled upon the historic "Cockatoo Run" pulling in to Platform 1 after a tour, and took a few snaps of 4306 and 44211.
Anyway, due to my productive PC time being limited today to only a few minutes at a time, I have been playing with Gmax Textures and finally have a method that works. Im using Multi-Materials, and also using LithUnwrap to create the texture templates which I can simply repaint later.
The picture above is the Buffer that I have been working on, with a very rough test texture applied to it. The texture is currently the raw repaint master template created by LithUnwrap with about 30 seconds of work done to it to give it the black front.
While I was at Sydney Terminal I discovered some more detail which I need to apply (It wasnt apparent in the photos I was working from), so before I start setting it up to be tested in Trainz, I will have to go back and add the missing detail, then retexture it again. There will be two versions - a simple one similar to this which is often found at the end of the line (ie: Nowra), and the Sydney Terminal style with their "feet" and lights. (You''ll understand the "feet"thing when I post a pic of one).
I finally figured out why I havnt seen a lot of my wife recently. Apparently she moved out a couple of weeks ago due to my spending so much time at the computer recently. I hadn't noticed, though it has been a bit quieter lately.
Im kidding. She's due home in an hour, so I had better make the most of the remaining time.
I should be getting back to the Tangara tomorrow. I know thats what you are really waiting for.
Subscribe to:
Posts (Atom)