Showing posts with label Interiors. Show all posts

Thursday, July 07, 2011

Battling the exporter

I managed to get an early draft of the 86 Class into Trainz for testing, and so that I could see what needed to be done to tweak the textures. This picture has a very rough texture on it for the moment.

So I started tweaking and moving things around, re-exported the model, and now it wont show up in any of Surveyor, Railyard, or Driver, in TS2009, despite showing up fine in Asset-X, Pev's Mesh Viewer, and even in CCP. There are no errors in CCP or even in the export process, and this has me stumped. All I can do is keep tweaking the textures and hope that the exporter begins to co-operate. I was even able to drive the one pictured here, but now - nothing.

Each time I've exported a model I've found the exporter to be very picky, especially about materials. At one stage it would just crash Max to the desktop if I renamed one particular texture to the standard .m.onetex naming convention. It exported just fine without that extension. Other times, it has crashed to desktop for no apparent reason, but every time it has been related to the materials.

These exporters have been around for over three years. One would think that Auran (N3V) would, from time to time, update the exporters - patching bugs such as these, but unfortunately Auran seem to be of the impression that you can release a piece of software once, then just forget about it. Not so with their flagship product though - they've released 3 or 4 versions of Trainz since the exporters were last updated. They seem to understand the concept of software development only when its directly connected to making them money, but without the exporters, where do they think the content would come from? Without content, JET is just an engine. It does nothing on its own.

Still, I press on. I keep tweaking the textures on the 86 Class, hoping that I'll hit that elusive magical combination that will cause the exported model to show up in Trainz - after all that's what its all about. In the mean-time, Im fiddling with a few side projects that are still in the modelling phase. I don't need to export them just yet so I can model happily without any problems.

Here is a shot from inside the cab. This is the low-res cab that is a part of the body mesh. You will see it through the windows in DCC mode. I tricked the camera to place it inside the cab on a multiple unit set. I've been trying to get the shiny stainless steel effect the way I want it, and I think its getting pretty close. The first thing that struck me about the real cab was how shiny it was. As you can see, there are still parts of the cab, and body that are untextured at this stage.

I've put the 86 Class aside for now and as I mentioned have been working on other things.  One of those things is a route. I want a route that is a) Unmistakably NSW, and b) appropriate for the 86 Class and the Tangara, so I've started putting something together. Ive always been impressed by the detail in the Wadalbavale line, and the sheer size of Pine Ridge, and Razorback, and I'm hoping to eventually come up with something inspired by all three.

I've started with the mountains - inspired by Lithgow being the former home of the 86 Class locomotives. At the highest point the rail is 600m above sea level, and Im gradually working my way down to sea level with some 2 and 3% grades to give a bit of a challenge, and to make good use of the dynamic regenerative braking in the 86 Class. This will be a coal run, down to the port at sea level.   I havnt started on any other sections but there will be other areas to explore as well, and of course commuter trains, which is where the Tangara comes in.

One major thing Im missing is decent Cityrail stations, so Im currently building one that I can throw in there for the time being. I'd like to expand on that and make a series of stations, but that is for the future.  I'd like to build something generic and have options available through scripting, similar to Andi06's station kit.

The Tangara is waiting to be converted to Max. I figure since TRS2006 is no longer supported there is no reason to keep it in Gmax.  The conversion process is a bit bumpy so I've been putting it off, but I hope to have an update on the Tangara in the next post (and some pics).

I'm not going to bother right now with the poly counts that I used to add to my posts, suffice to say the 86 Class in the pictures is about 18,000 polys and will use LOD by the time its ready for the final export.
Posted by Picasa

Saturday, March 14, 2009

86 Class Update

Ive spent most of the last couple of weeks working on the 86 Class. This is the one that has been tearing at me to be finished, so I needed to make some progress on it. I've done a lot, and now that it’s ready to be texture mapped, I can leave it for a while and catch up on the Tangara too.

I finished off the body detail, headlights, marker lights, side mirrors, windows etc, and cleaned up the roof, then mirrored the body and base to create the other end of the loco. I started on the low res interior next. This is the one that will be seen in DCC mode, from outside the train (through the doors or windows). Technically, its part of the body, but I'm keeping it separate for now. I isolated parts of it that would have detailed textures, and then used a micro texture to map out the general colouring on the rest.

A micro texture is a 32x32 bitmap with 16 colour squares on it (4x4 each). Using detailed textures only where they are needed and micro textures for everything else greatly reduces the amount of memory required by the graphics card to hold all of the textures.

I added all the under-frame gear - compressors, motor-alternator, main reservoir, etc and joined the body and base together, then hand optimised it to get it ready for texturing. I also added the Comeng builder's plates and will texture them separately later. At this point, I built the bogies and moved them off to their own file, ready to be imported into Trainz. The pantograph has also been finished and is ready to import.

The horns had been on my hit list for a while now. They started as a single horn from the Art Source CD, which I used to create a basic set of 5 horns for the 86 Class, but they are very high poly. I finally got around to fixing them and mounting them properly. I took over 1800 polys out of the horns alone!! (900 each end)

I did some fine tuning of the low res interior texture mapping, and then went back to the high res one (for Cab Mode) and cut holes in the drivers desk for the gauges and indicators. I had been leaving that until last since the boolean (cutting) tool always tries to optimise the mesh but usually ends up doing more damage than good. To avoid that, I detached the face of the panel before I cut, limiting the damage just to that area, and then hand optimised and repaired it before re-attaching it to the interior.

As a final touch, I added the Auran Fire Extinguisher in the appropriate place. I’m going to make that a trade mark - each of my cabs will have an Auran fire extinguisher somewhere :)

Now that I’ve mirrored the two halves of the loco and added al the asymmetric detail, the poly count has doubled, as expected. My previous post deals with that. Also check out my Flickr sets by clicking on the slide show to the right… I’m uploading screenshots there as I go.

Overall, there was quite a lot of work in this update, and now that its done, I’m ready for a change, so its back to the Tangara for a while. I’ve learnt a lot while doing the 86 Class, and have used different techniques in places, and these will be transferred to the Tangara so that both models will benefit.

File Version: 150
Poly Count: 22,900

Note: The poly count shown here is for the Gmax model in progress. The count will generally be higher than that of the finished in-game model since it includes duplication, tools, jigs, and other pieces which may not be part of the final model. It may also include parts which are generally counted separately, such as pantographs, interiors, or bogies. LOD modelling will be used to further reduce in-game polygons.
Posted by Picasa

Monday, March 02, 2009

86 Class Update

Ive been busy over the past couple of weeks. I spent most of that time getting used to Gmax again and remembering how to do all of the tricky stuff. I started on the Tangara first, but will post that later so that it appears above this post.

The 86 Class is by far my favourite locomotive, and Ive been itching to get back to this. Looking at it again after so long, I noticed a lot of little problems that I didnt see before, and I have fixed most of those. I also found some short-cuts that I took earlier to save a few polys, have come back to bite me. I left a few edges disconnected, so that I wouldnt have to add a vertex to the other edge (adding polys), but now I can see some tiny annoying gaps, so Ive fixed that, even though it adds a few extra faces.

I corrected some problems with the front of the base, aligning it better, and improving the corners. These fixes saved a few polys. While I was doing that, I figured out a cheat to save even more polys, and took out around 200 or so, without affecting the look of the model. This was mostly underneath. The foot holes through the front plate, and other things were mirrored on the back of the plate. I realised that with backfacing polys being invisible, that I could remove the detail at the back, which is rarely seen, without changing how the front looks, so underneath is now just a simple flat wall, saving all the faces which made up the corners of the holes which didnt really need to be there. Unfortunately all those saved polys came back, and brought friends, when I started on the interior detail.

Previously I had a couple of Auran brake levers temporarily in place, and the brake stand from one of the models on the the Art Source CD, which is almost a perfect match, but not quite. The independent brake is mounted quite low, and on the 86 class, has a bent handle to raise it up to where the driver can reach it. The train brake handle also has a slight bend in it, and the mount to the brake stand allows it to be removed. I quickly knocked up a mount and attached it to the top of the brake stand, then tweaked the Auran levers to be more like the real thing. Im quite pleased with the result, which you can see in the enlarged picture (or check my flickr pages for the latest screen shots).

I finally found a picture of the reverser handle (I had it all along) and realised that the reverser lever was not quite right, so I made it a bit shorter and stubbier. I added the small rails around the horn and wiper controls (added those controls too) and also the drivers and observers switch panel above the side windows. All of these will operate, and the attachment points are all in place. The speedo was floating in mid air (the cyan thing on the left) so I finished it off by adding the mount, and mounting it to the wall. To save on polys, Im not going to model the cables that extend down into the dashboard from it. You can pretend that they disappear into the wall through the mount :p Finally, I added the doors and cut out the windows in them. they're set up to be animated later.

I created some industrial push buttons and mounted them on the dash. I plan to reuse these later in the Tangara too. On the 86, these control the pantographs, and there are a couple of fault ack/reset buttons in that cluster too. I also made one (slightly different) for the backwards transition button, which can almost be seen on top of the master controller between the throttle and regen handles.

One thing that Trainz doesnt do well are push buttons. You can set toggle switches up as levers, and they work fine, but there is no built-in push button function, and nothing close (like a lever is to a toggle) that will easily do the job. I have a couple of solutions in mind, and Im sure other creators have used both methods in the past. One is to make each button a lever with a very long radius and a tiny amount of movement. By placing the pivot several metres away, you wont notice the slight arc in the buttons travel, but it will be very sensitive and possibly difficult to operate. The other is to borrow a steam engine trick and make them animated, with a collision mesh to trigger the animation. This is the method Im leaning towards, as it seems a lot simpler and more reliable. It seems that all modern cabs have push buttons now, so I hope that Auran have a better solution with Trainz 2009.

File Version: 123
Poly Count: 11434

Note: The poly count shown here is for the Gmax model in progress. The count will generally be higher than that of the finished in-game model since it includes duplication, tools, jigs, and other pieces which may not be part of the final model. It may also include parts which are generally counted separately, such as pantographs, interiors, or bogies. LOD modelling will be used to further reduce in-game polygons.
Posted by Picasa

Wednesday, January 03, 2007

86 Class Update

A few months back, before I disappeared I mentioned that I had done some more work on the 86 Class but didnt post any pictures of it at the time. Here are the latest shots, as of today.

After installing Gmax and other tools on the new graphics machine (I call it Minotaur - its easier to call it by name in future) the first thing I did was finish off the basic structure of the 86 Class cab. When I left it, there were a few problems with the front windows and I had not created any of the window sills (front or side) that join the interior and the body together. Thats all been done, so now I just have a few more details to finish off, such as the gauges on the drivers console etc.

As mentioned before, all of the attachment points for the levers and dials that have been added so far are there - I just have them turned off in the pictures so that they show the model better.

Basically I removed the interior's front windows completely and replaced them with a copy of the body's front windows, but moved back a little, so that they would be in alignment with the body. Then I just had to move a few vertices around and weld everything together. I created the sills and realigned the console so that it joined with the new front wall, and that was about it for this session. The interior and body now fit together perfectly.

My web server died - the one whose disks I am upgrading. It keeps resetting every few minutes for no apparent reason and no amount of reseating cards, replacing cables, or cleaning away the dust seems to make any difference. I have one more thing to try, but the next step will be to borrow the HTPC's motherboard and use that temporarily. The poor HTPC is starting to look like an empty shell as I continue to borrow parts from it. My wife (who helped pay for it) is starting to wonder when she will be able to use it. Doh! Did I mention I hate computers?

File Version: 86
Poly Count: 6601

Note: The poly count shown here is for the gmax model in progress. The count will generally be higher than that of the finished in-game model since it includes various tools and other pieces which may not be part of the final model. LOD modelling will further reduce in-game polygons.

Saturday, March 25, 2006

Going Digital

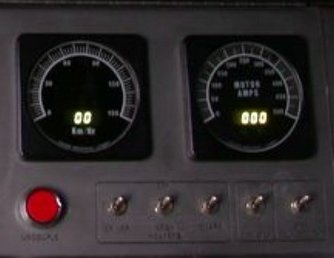
Whoever desgined the cab controls in Trainz, was clearly thinking of old fashioned analog gauges and toggle switches. Its dead simple to build a cab with these types of controls. Unfortunately our Tangara is a modern train, which uses digital displays and a lot of big round push buttons (as well as some toggle switches).

Trainz doesnt handle these well, and requires you to think of ways to make it do things that it was not actually designed for.

Well, Im excited. After a couple of weeks thinking about the problem, and several hours spent reading through old forum posts, the Content Creators Guide, and trying out a few ideas in Gmax, I think Ive finally cracked it. In theory anyway... I havnt tested my ideas in Trainz yet.

We know digital gauges can be done. There is an excellent range of payware locomotives that have them. Its just a question of how. I also got a hint from eldavo on how a big red push button might work in Trainz, and I will be trying that out soon(tm).

Essentially the gauges here are an analog/digital combo. The analog part is easy. The digtal part will require some work. Its basically animation - 150 hand built key frames (in the case of the speedo) Doh!!

That sounded hard until I realised the Ampmeter reads from 0 to 500! Doh!! Doh!! Doh!! I may cheat a little on the Ampmeter.

Getting them to work will requre some scripting, and I have been thinking about that too. The script for the Tangara control trailer is currently being built in my head, and its HUGE!. Hopefully in a few weeks, I can move it on to my computer, and free up some brain-space :)

Im also thinking of ways to make the TMS (Train Management System) computer work (or at least, appear to) and that thought process is coming along nicely - it will probably be done by texture replacement, like the external livery will (hopefully) be. I have a few other ideas brewing, and some of those will be a surprise (presuming they work).

For now, Im not planning on creating any ground-breaking technology such as refueling locos, coupling / air hose systems, or dynamic texturing libraries, and the like, (we all know the ones Im talking about)... but I do want to bring all of the existing (mostly seperate) features that we know about, together in order to bring the Tangara to life.

For example, the Tangara has (as most trains do) headlights and marker lights. It would be remiss of me not to script them, since we all know that this can be done and the scripts are available. We look forward to finding this feature in a new download. In fact, for me at least, it can be quite disapointing to download a nice looking locomotive, only to find that it doesnt have even basic features such as this. It all adds to the realism.

My wife already tells me the untextured static Gmax model "looks real" on occasion.

Bit I digress... Im not intentionally trying to build the hype around the proposed Tangara features, Im just sharing my thoughts. Its actually rather frustrating knowing that Im "this close" to starting to script all of the features together. The ideas are racing through my mind. It would be so nice to get it over with and move on, but that is probably a couple of months away, at least.

Im sure the wait will be worth it. Im also hoping that Auran will release SP1 soon, as part of the scripting requires a fix to the 2k6 decouple bug, so while we wait on that, I can continue to refine the Tangara. If it gets to the point where the Tangara is done, and SP1 is still pending, I'll work around it somehow.

No progress report as such (perhaps tomorrow) but the front end detail is almost done. The file version is up to 297, and Im thinking about starting on the rear end detail.

Actually.. I recently figured out that each file version represents about 30 mins to an hour's work (possibly more) so that may give you an idea of how much goes into one of these (and I still have the motor carriage to go, and at least 6 different versions of each to cover all of the feature / physical differences between the 3 types of Tangara sets that Im building) Posted by Picasa

Sunday, December 18, 2005

S Set Cab and Tangara Progress

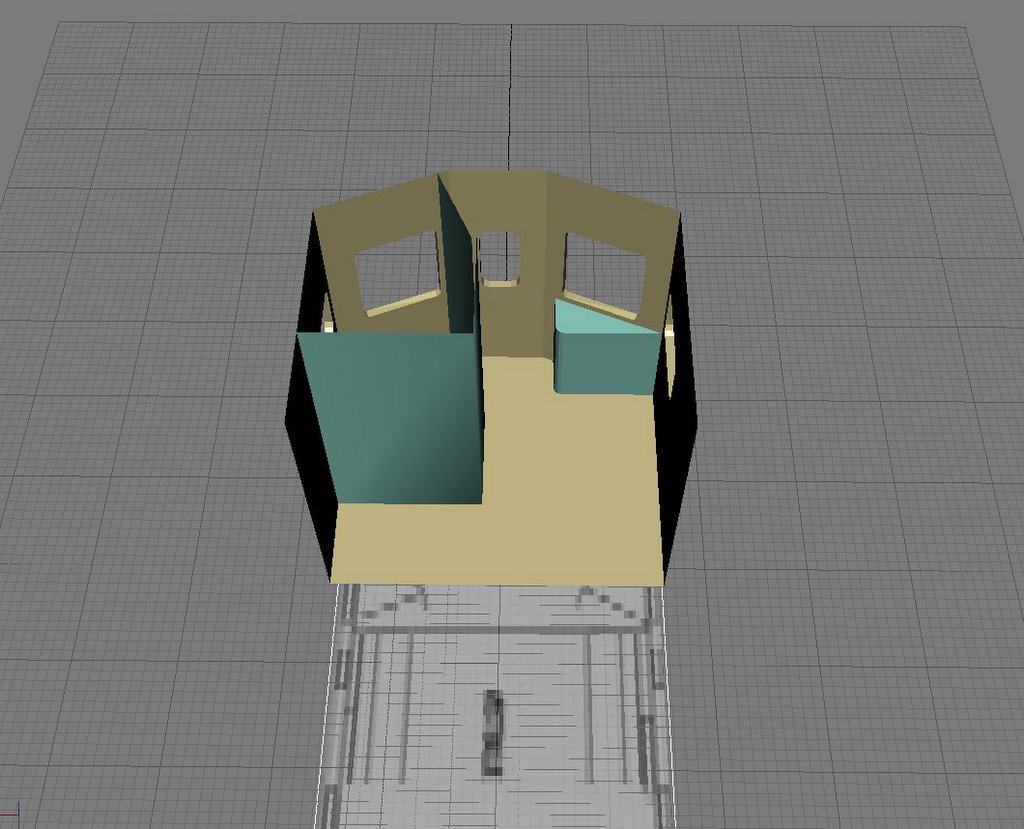
Ive been working on the Tangara, but it doesnt look much different, so here are a couple of pics of the latest S Set Cab additions. The first is from the front. Any polys that cant be seen from the inside have been deleted, which is why you can see through the walls from this angle. As I mentioned earlier, I added the chair and fire extinguisher, from Auran samples. I also added the data logger and crew air conditining controls (probably the most important controls on the whole train). I have a few more bits and pieces to add (drivers door, for one) before Im ready to start on the controls and finer detail.

The second picture shows the view from the back, looking forward out through the front of the train. You can't see the ceiling in either shot, but its there. There will be multiple camera angles (if I can figure it out) for driver and guard, since due to the seperating wall, you wont see most of my hard work from the drivers view. There is a lot more work to do, and it will look much better than this when finished and textured. (Right now only the chair and extinguisher have any textures on them). I'll also be adding the glass, so dont panic, the windows will be included.

I cant bellieve how boxy and basic these cabs are, compared to the Tangara. You wouldnt want to be claustrophobic driving one of these!

Tangara
Ok, some basic Tangara news. I went to the ARHS Research room today. I thought they closed at 4pm, and arrived just before 3pm. They close at 3pm. doh! I had a few minutes and managed to grab a set of plans for the Tangara, but alas, no bogies. I have an alternate source for bogies plans that will hopefully come through soon, so its not a complete loss. I also grabbed the plans for the A8 type stations (1914 brick building, like the ones at Redfern, though technically they're modified A10's) The A8's are found on island platforms all over the network, so that is where I plan to start on the platform project, once I get some time. I browsed through the V Set plans, but there are so many variations I didnt have time to choose what I wanted. I'll go back to get those (and some other stuff) in the new year.

So anyway, back to the Tangara. Since the last picture I have added the window frames on both the upper and lower deck. I also spent a lot of time hand optimising the polygons, and managed to reduce the poly count by over 200!! It went down to around 1400 polys for a while there, until I added the window frames - then it went back up to 1680, but at least its not 1880! As Ive said before it will shoot up when I add the seats and other detail, but will be manageable. Thats about it really, the only visible difference is a few extra window frames - not enough to justify a screen shot, but a lot was done that wont be seen. Also now that I have the plans, I will have to spend some time adjusting various measurements by tiny amounts so that it is more accurate.

Gotta go. Enjoy. Posted by Picasa

Thursday, December 15, 2005

Let there be light

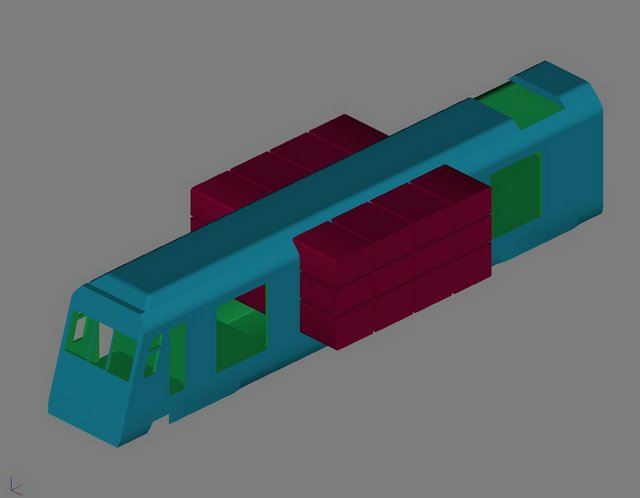
Ok, so this is really a bit of a tease. I spent a few hours tonight preparing to cut out the center windows of the Tangara. It took me ages to get each of the 12 windows and panels right. I started with a line marking the first window, converted it to an editable spline, and moved the verticies around a little. Then I made the other windows in the same row, and spent ages trying to get the size of the windows (and center panels) right, and then copied them for the other three rows. In the end, its pretty close, but not perfect without accurate measurements. Visually you shouldnt notice anything too strange, and if you do, I'll keep playing with it until you dont :)

Once I had the splines in (almost) the right places I extruded them to make the large redish blocks shown above. These were then subtracted from the body to form the holes. It was about then that I noticed a few problems. Making the windows had caused a few polygons in the roof to dissapear, as verticies were created and removed around them. This is due to the roof always having been a seperate piece in the past. Now that it is attached to the body, there is a definite edge between them. You wouldnt see this in the finished model, but it means extra polygons. I need to go back and hand-optimize the roof so that both it and the body are one single piece with polygons shared between them, rather than hard edges.

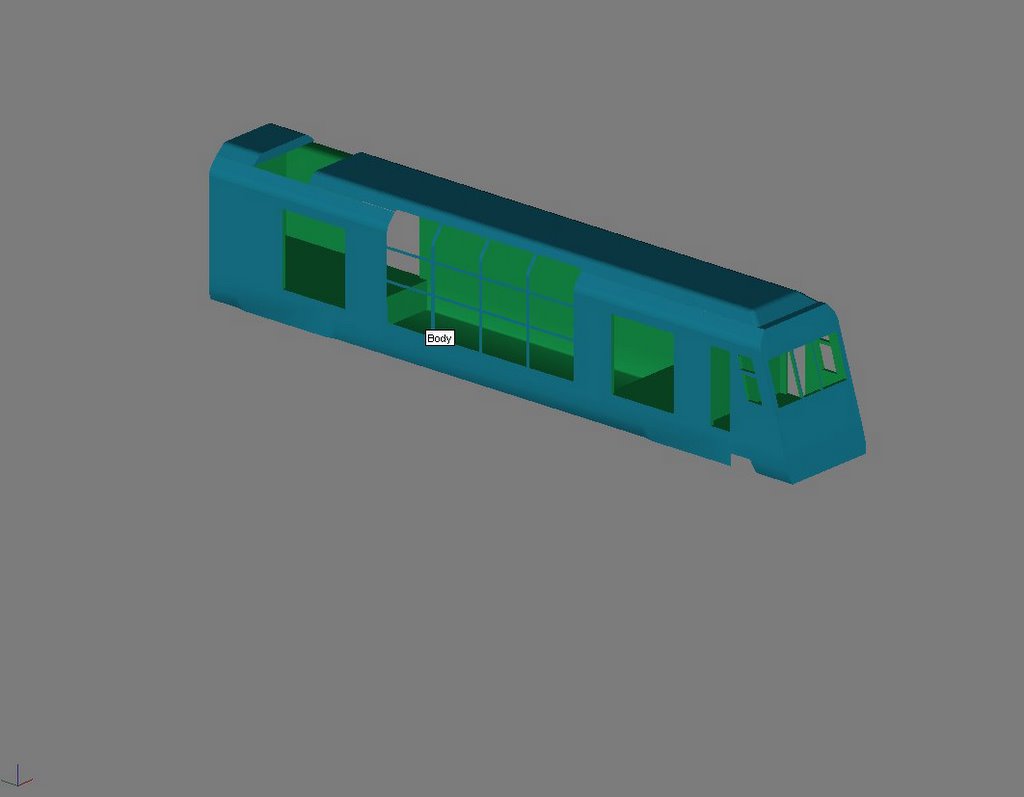
Once the body and roof are a single piece, I can go back and cut the windows again - Thats the tease. Ive backed up a couple of versions and im back to the seperate roof / no windows model, but I have all of my window blocks (including a few spares) so once I have fixed the mesh, cutting the windows out will be a snap, and with the polygons all in the right places, I wont have the problems that I had earlier. While Im doing this, the skirt has the same problem, though its not affected by the windows, but I may as well optimise it too (It will have to be done eventually). Overall, this will give a smoother finish and a few less polygons. The count really shoots up with the windows cut out, and thats not including the cuts needed for the interior windows (for looking out or through the carriage). Its still managable though.

S Set Cab
I did some more work on the S Set Cab yesterday. I'll post an updated picture soon. Ive been a busy boy. I added a few more pieces, Drivers chair, Fire Extinguisher (both from the Auran samples) as well as the data logger and crew air-con controls, and a basic dashboard panel (just the panel so far). Im still waiting on my research to arrive before I can start working on the dash properly. The only other things to do really are the Guards seat and Drivers door, before I can start on the finer detail like the hand brake and light fittings (I also have to texture it of course).

Textures
After playing around with textures and methods of texturing, I can see why a lot of Trainz objects have multiple texture files and Im starting to see where its helpful. I'll modifiy the method I have been using to include that technique, for various parts I will still use one large file (Things like the Tangara body (outside) would be one larger file). Im discovering what works, and what doesnt, as I go.

Platforms
I did a bit more research on platforms, both how to make them for Trainz, and looking for diagrams and details of the real thing on the net. Im planning on making a trip to the ARHS Research Center on Saturday (a mere 10 minute walk - lucky me!) and spending some real money on whatever useful material I can find. I have a list already of everything from stations to locomotives, and catenary (I havnt forgotten). Someone recently offered me some material covering platforms / stations, but it was in a large file. Ive been thinking about how best to deal with it. If you're reading this, I'll reply shortly.

Xmas break
Alas, its that time of the year again when everything shuts down for a few weeks. (Can you tell Im not a Xmas fan?) While I know I will keep working on things almost right up until Xmas, I also know that I will be taking some time off to spend with friends and family, and will get back to all of this some time in the new year. My wife has been very understanding of the hours (more hours than usual) that I have been spending at the computer in recent weeks. She deserves a bit of dedicated time in return. Im a geek, so Im always at a computer, but as I said, lately, its been more hours than usual. Xmas, and a few weeks after that, will be payback time.

Thats enough for now.

Tangara poly count: Was around 1500 before I backed-out. That included my cutting blocks and other non-model pieces. The body alone was 611. Posted by Picasa

Tuesday, November 29, 2005

S Set Cab Update

The S Set cab is coming along slowly. I just realised that its for a Comeng type, due to its shape, but I should be able to detach everything and slice it up a little to make the flat faced Goninan type cab fairly easily.

It doesnt look much different to the last photo, but believe me, GMAX is deceptive that way... you just dont see the hours that went into something that looks as simple as this update.

I lost a whole day trying to figure out how to fix a problem I was having with the gmax boolean tool. It left the window sills as I wanted on two windows, but on others it either lost part of the sill, or it didnt produce it at all. I finally deleted the broken bits of window sill, and extruded new ones, which bunched up the polygons a bit, but a smooth modifier fixed that.

As you can see, Im also doing the guards area. I havnt figured out how to change cameras in Trainz yet (I havnt really tried) but I believe you can place a camera at the observer's point of view, so you will be able to see the guards perspective. I've yet to put in the driver's and guards seats, and some of the finer details (hand brake, door controls, light fixtures, HAL9000 (Black box) and some structural peices. Once that's done, I can put it aside until I get some pics of the controls. I have a couple of sources lined up for those.

The drivers compartment door will be propped open, as most drivers leave it this way. I cant blame them - their cabin is pretty small. I have a new appreciation for Sydney train drivers after modeling this.

Current poly count: 222. Now, its back to the Tangara for a while. I still havn't seen much of my wife :) Posted by Picasa

Monday, November 28, 2005

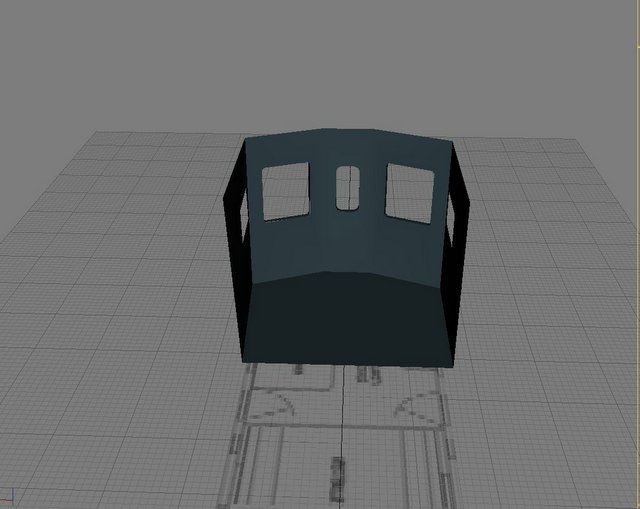
Another day, Another screenshot

I've started on an S Set cabin, since Im still stuck on the Tangara. Cabs are a lot of work, and most of it is in front of me... gauges, levers, scripting etc... not to mention the textures. Hopefully I'll be able to get some reference pictures of the controls so that I can lay out the drivers console. So far, its 135 polys, but that will go up as I add the interior. Oh well... back to it. (I wonder what my wife looks like :) Posted by Picasa