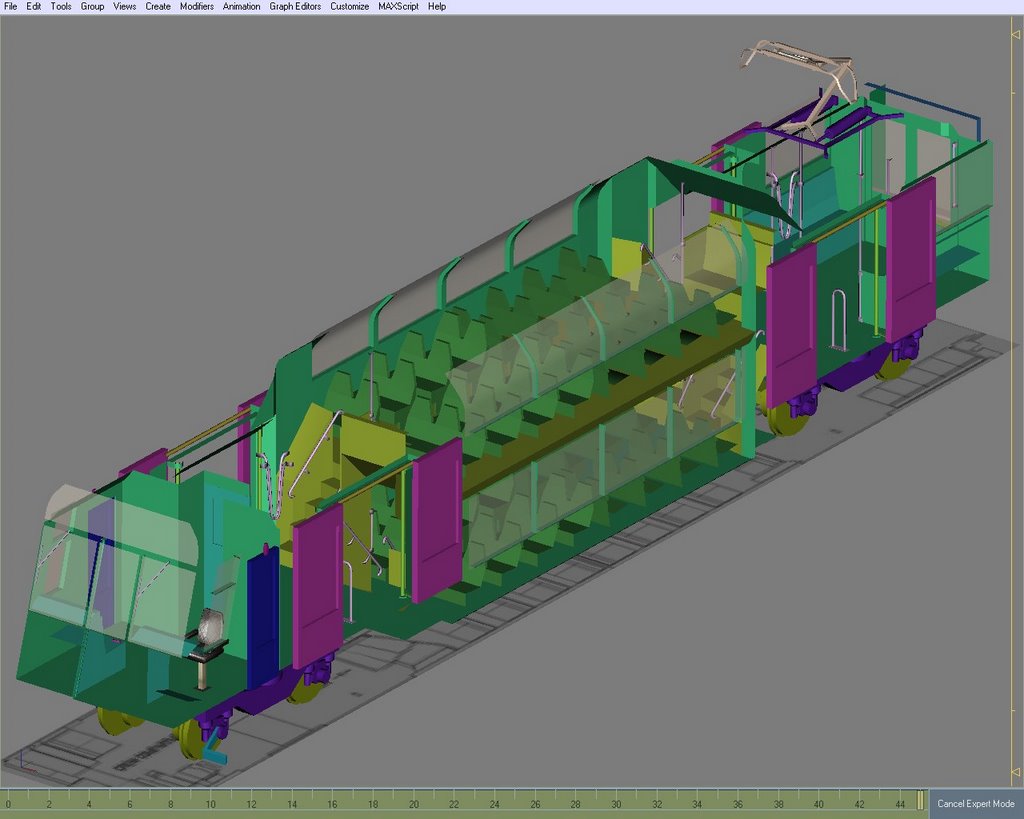
 Ack! Im Naked!!
You've seen enough shots of the outside of the Tangara model, and I happened to be working on the model as shown (only the exterior body is hidden) so I thought I would share this unusual view.
Ive spent this week tweaking things. I started on the gangway, but realised I have no photographic evidence of it working the way I had imagined, so Im totally rethinking the animation I had planned for it. I had thought the internal "wings" (for want of a better name) folded back over the doors when disconnected, but it seems, from the photos I have managed to find that they remain in place, and there is only a very little amount of contraction of the corridor that occurs (much less spectacular in animation). Im leaving that until I think about it some more. Of course I could always use artistic license to make it animate better :)
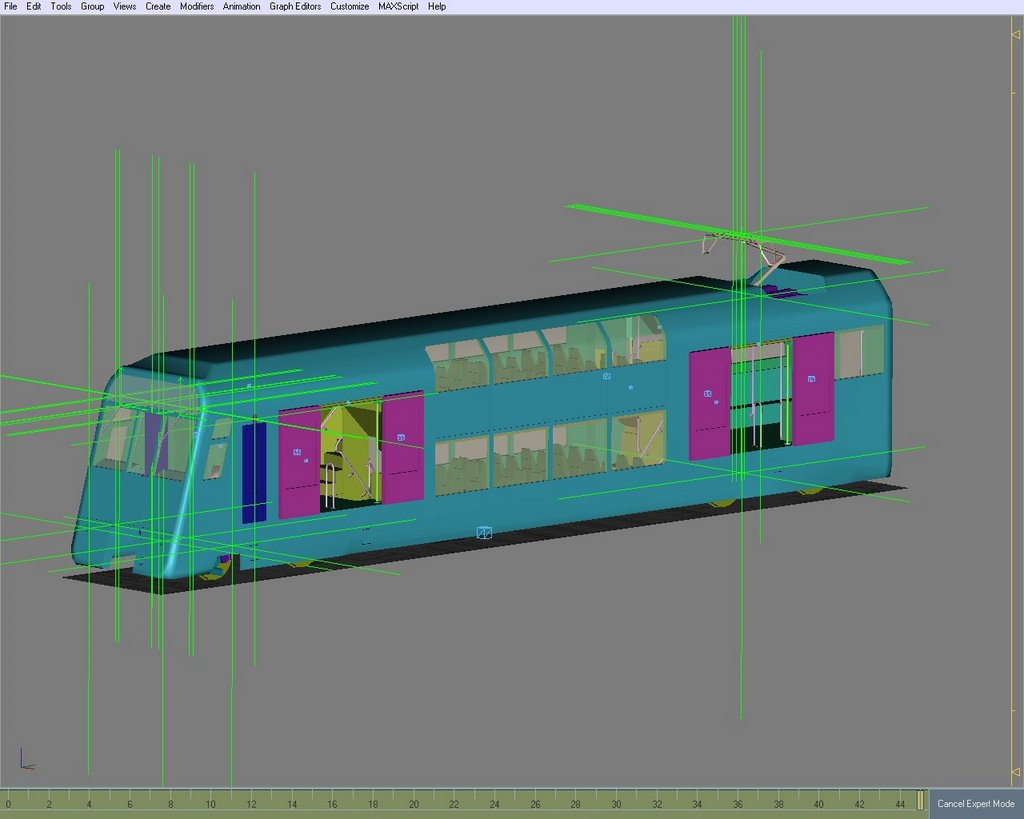
I added the windows. Adjusted the position of some handrails and door inserts, and added the pantograph, which reminds me that I detailed the roof a little more around the cutout section where the pantograph goes (Its now curved like on the prototype). You'll see what I mean in future shots of the body.
Im thinking of redoing (yet again) the passenger door animation, to make it full cycle (closed - open - closed) which is what is needed for the sounds to work. Its currently half cycle (closed - open) as is used in the standard Auran left-passenger-door style of config (they play it backwards for the close sequence, which is not what I need).
I realised that I had not detailed the crew emergency door on the inside - it looked like it was part of the interior wall, so I quickly fixed that. I hope to animate it one day (but not today), so it will need more work eventually. Its fine for the initial release the way it is now. Of course having made a noticible door in the base model, I will have to reverse that when I make the 4D, which doesnt have that door.
I know I type too much, so speaking of the 4D, and since you're good enough to read this far, Im going to be building 2 versions of it. A running version, (which can also be parked as stored if you like) and a derelict version, stripped as it was, which can be loco-hauled (but undrivable). I think that makes it 4 train variations now, and 9 cars that will need to be built to cover those.
 Oh, yes, and I also added the wipers, and started on the Train Stop trip arm. (the hangy bit front left). Its starting to sound complex now, but its almost there. Somehow with all this work, Ive still managed to lose 300 polys on the last count - unless my math was wrong last time.
All the attachment points are in for everything created so far (lights, doors, wipers, pant, bogies etc), and the only things left now, besides a little more tweaking, are the couplers, trip arm, and gangway. Then its off to the paint shed for some textures.
The actual models that will run in Trainz will then be created from this one. While that is happening, I can start testing the scripts, using this model as a test-bed to get everything working.
Andii06, has sent me the library I mentioned last time, which covers many of the features that I had planned, and has a really nice "properties" interface in surveyor, so I only have to write the code for a few special (and some surprise) features not covered by his library.
I also have to build an interior model for cab mode, which will be based on this interior, but with more detail (levers, buttons etc) and write a script for it. I also need to write a new library which will act as a communications channel between the interior and exterior scripts, so that if for example, you open a door in cab mode, you will see that door open in DCC mode as well.
The base Gmax model is getting really close to finished, but its also a very long way from being ready to upload the final variations to the DLS. Theres also a few other things to do. Since its my first train, I will need to create a driver, and anything else that may be needed. These could be reused in the future, but I have to create at least one, at some stage.
Yes, there is a reason for those extra attachment points above the pantograph :)
BTW: I finally figured out how to get large images into blogger... dont use Picasa :)
File Version: 341
Poly Count: 10,100

6 comments:
awsome awsome awsome!
will things in the cab be animated?
blinds, seats, maybe even open the cab doors for air and other drivers? will you be able to move from the drivers seat to the gaurds seat? and maybe even standing as the gaurd?
just a few idears to make an already awsome model tad better
my god wylie!!!! this is looking so fantastic. i know i shouldnt say this but it should be payware. i cant believ its your first model. it is looking so good. anyway, keep up the great work, cant wait for the next update.
ky
Nice! Looking forward to it.
Have you had a look at the CityRail Driver figure used in the Endeavour RailCars, made by Davido? Isn't that similar to the Tangara Driver if not the same.
Keep up the good work :)
Alex
Whoa!!!!!
Awesome work Wylie!
This is the most best model so far in my whole life, would you make the doors animated or other things like Nathan said? I think that will finish the picture
Keep up the good work!
The model is looking brilliant! Very very nice work!
I'm also looking forward to the 86 Class Wylie. The Diagram so far is perfect!
The Tangara is so far the greatest
Keep it up Wylie, Your a true creator...
Post a Comment