Wednesday, May 31, 2006

86 Class Progress

Ive been busy this week with real work, and so have not had as much time to spend with Gmax as I would like. This will probably continue for the next few weeks. If you're interested, Im building a mainframe Linux-390 system on my PC (using an emulator) to be uploaded and run on a real S/390 mainframe hopefully in the near future.

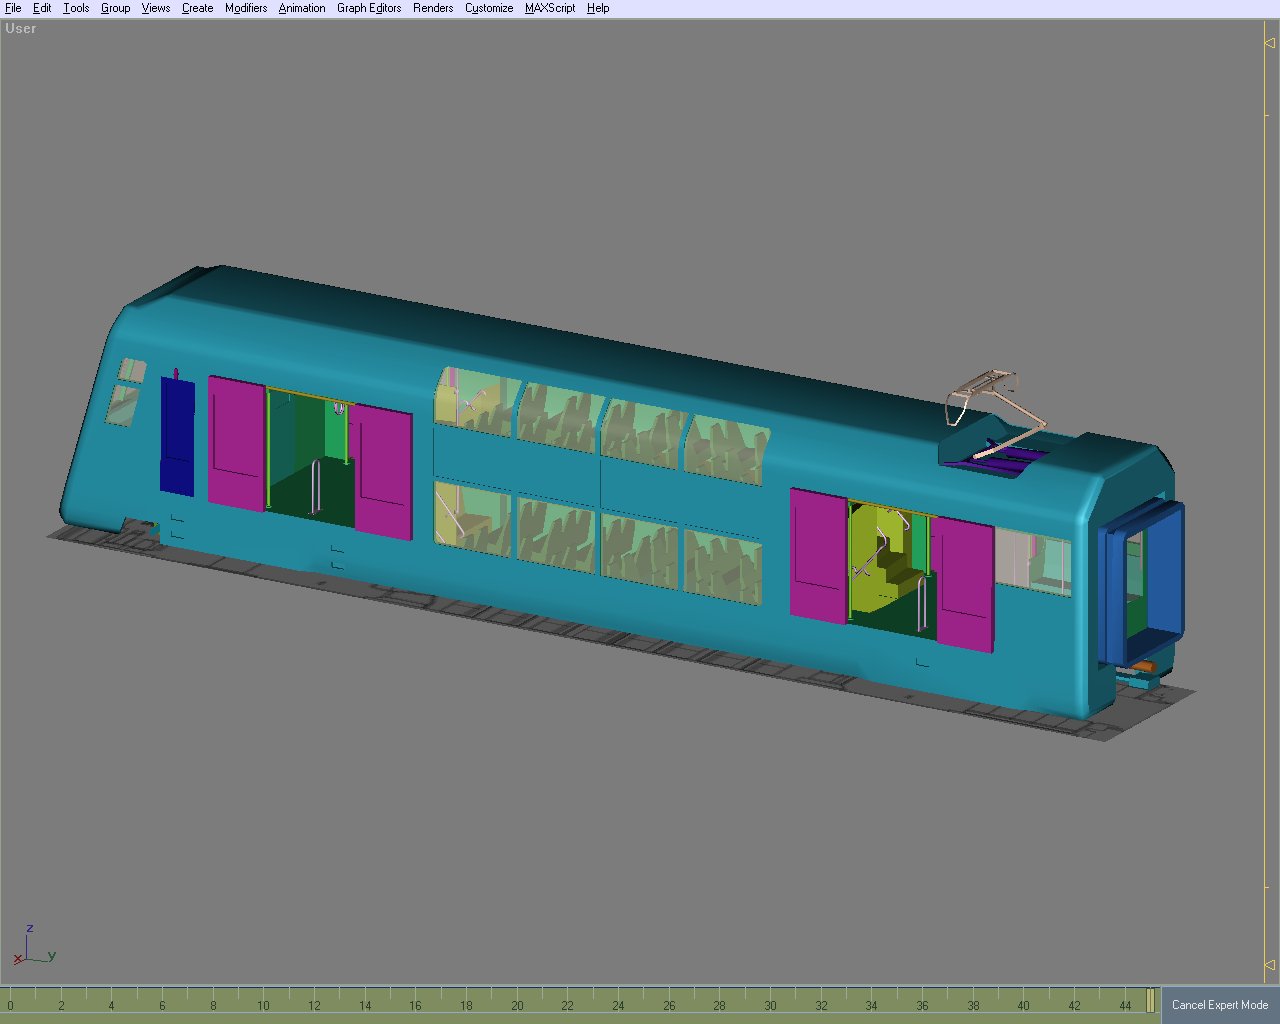
I did manage to do a bit of work in Gmax, and it was mainly on the 86 Class, with a little tweaking of the Tangara. Ive been peaking into Tangara cabs lately and have noticed a couple of things that I didnt see before, so these have been added. I'll get to skinning it soon, and will post a Tangara update when I have something new to report.

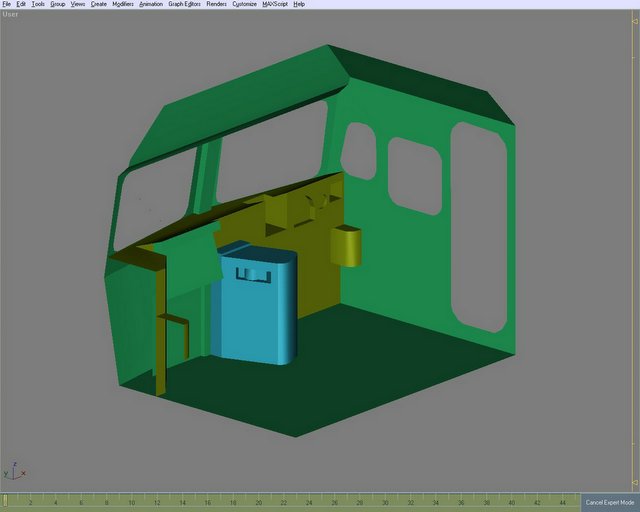
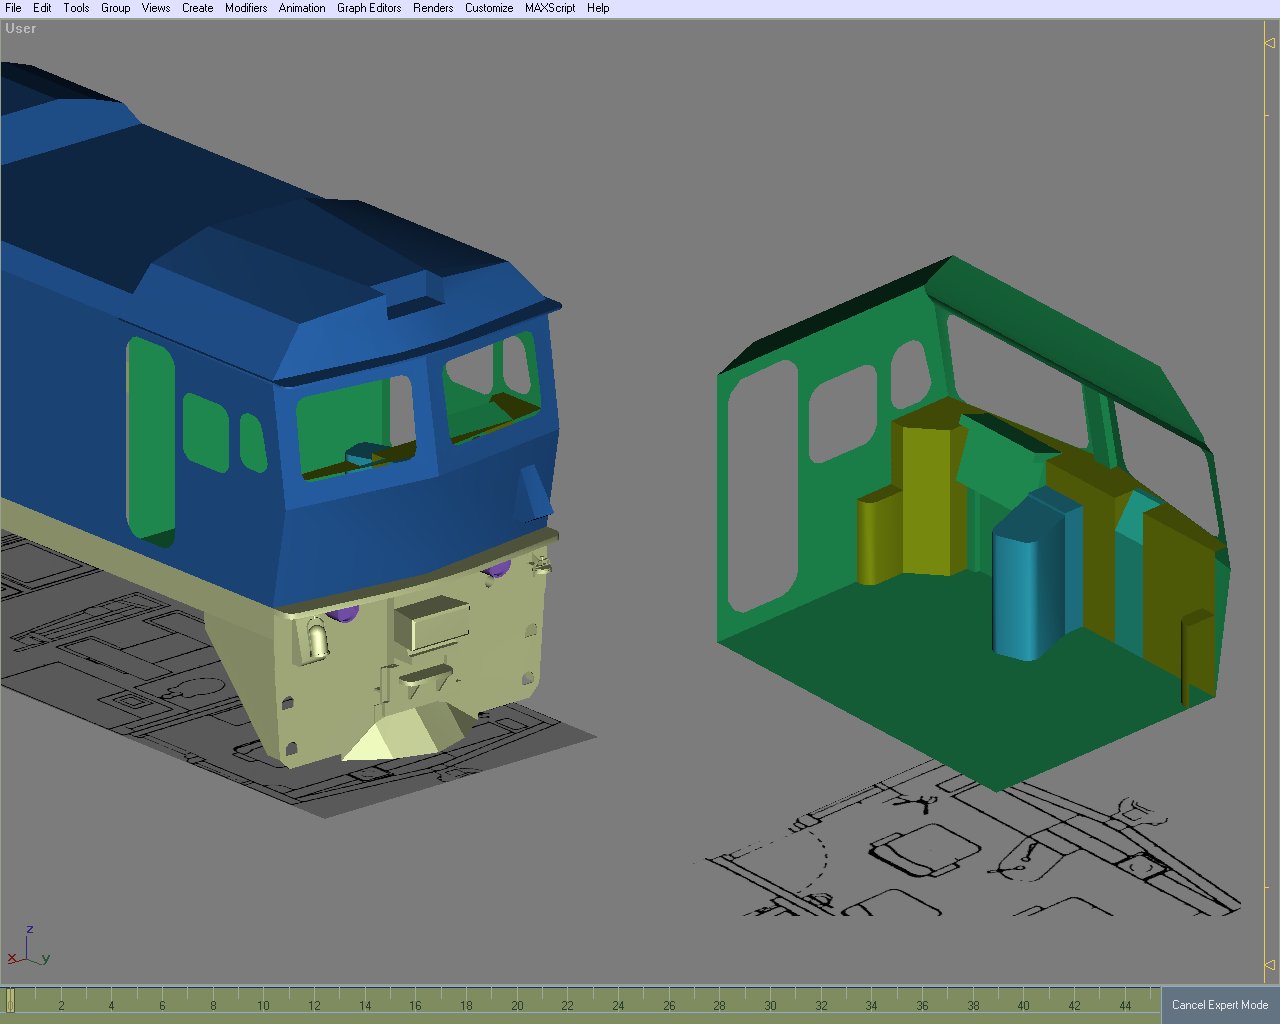
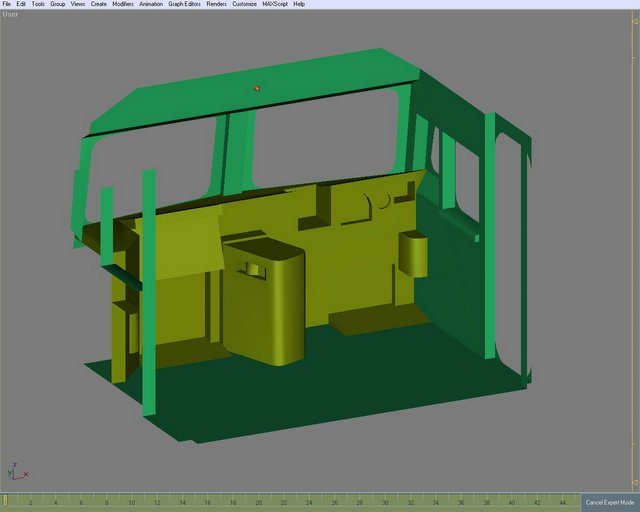
On the 86 Class, I have continued to work on the cab, and have detailed the left and right walls. There has also been a bit of tweaking of the dash / console area and the master controller, and the floor has been raised. If you're familiar with an 86 Class cab, you should recognise the picture above, thanks to the excellent photos that I have been working from.

The back wall will be next and shouldnt take long as there is not much detail there - just the AC controls, a fridge, an extinguisher, and a door handle. The rest can be done on the textures. I threw the plans out the window for a while, and just worked from photos, but as I began to figure out how everything fits, I realised that the plan was pretty close, and it was my floor that was wrong. Once I raised the floor, everything started to align properly again. (This is a different alignment problem from the one I mentioned earlier).

I recieved the back issues of Under The Wires that I had ordered, and these have some helpfull articles. Unfortunately one of the operating manuals that I ordered was out of stock, and I already have a PDF version of the one which did arrive. I had been looking forward to the missing one, as I was hoping that it might give me a bit more detail on the master controller. Hopefully I can get what I need from other sources. (I'll try the Railpage forums when I need to).

I deleted some duplicated parts, which dropped the poly count a bit. The count below is half of the loco, so double it for the whole thing.

File Version: 69
Poly count: 4300 Posted by Picasa

Tuesday, May 23, 2006

Tangara Progress

Ive just finished the base model. Theres still a lot of work to be done, so dont get too excited just yet. I need to tweak it a bit as Im not quite happy with the gangway, and a few other things.

The gangway took a lot of time. Most of it spent sitting and staring, trying to figure out how it would work when it was complete. Its a complex piece, since it will be animated, and if I can get it right, it will also swivel as the train goes around a bend. So that it doesnt show through walls etc, it has to be just right for it to work properly, and it took a while to figure out. No doubt it will be modified several times through trial and error before its finally finished.

Similar issues trying to figure out how best to implement the train stop trip arm - I gave up on it for now, since its not part of the main structure. It will be attached to the bogie, so I will deal with it when I finish those off.

So, the next step is a bit of tweaking, and then I can start to seperate the pieces, animate and texture it, and then start to create the other models, while I test it out in Trainz.

The scripting is still a long way off, but I noticed Alex's comment on the previous post. I have many features on my list, and sparking is definately one of them (See the end of my April 8th post). As I said to someone earlier today, I plan to specialise in electric trains, so its pretty much an essential feature.

There is also still a lot of other work to be done. I still need to finish off a driver character. Ive started on one but its being difficult. The Cab Mode interior still needs to be done, with all the levers and switches put in their proper place. That will take a while as I have yet to build the digital gauges I mentioned earlier, and I also have to figure out the best way to do push buttons. I have a couple of ideas, so hopefully that wont be too hard.

Poly Count: 12900 (same method as last time)
File Version: 355

Tuesday, May 16, 2006

Tangara Progress

I spent whatever free time I had on Sunday evening and Monday working on the Tangara again. I started on the Train Stop trip arm, but decided to finish the front coupler instead. Here is the result. The coupler is finished, which now just leaves the remainder of the trip arm, and the intercar gangway to go. The rear coupler is fairly simple and will be incorporated into the gangway.

I did a quick poly count (below). Its starting to become difficult to give a proper estimate, since in Trainz the poly count generally only refers to the body, excluding things like bogies and pantographs, which have their own counts. I have quite a few objects in the scene which will be removed to their own files later, so I have to subtract them from the total, and on this occasion I was lazy and only subtracted the bogies. The count shown here is just to give an idea of the complexity of the model anyway.

Im aiming for around 12,000 for the exterior view (which includes a cut down version of the interior). Auran recommend 9,000 for a diesel loco, but an EMU has a more complex interior, and the Tangara is a double decker, so I believe it would be a little higher. Considering that and improvements in processor speeds in the couple of years since the Content Creation Guide was last updated, I think 12,000 is not too bad - I'll be using LOD anyway, so it'll be fine.

Anyway, I know I didnt add 2,000 polys since the last update, so I know the figure below is too high.

Poly count: 12,700
File Version: 348

Posted by Picasa

Sunday, May 14, 2006

86 Class Progress

Ok, I know most of you are eagerly awaiting the Tangara, but Ive done a bit more work on the 86 Class instead. One of the reasons Im posting this early (on Sunday afternoon) is that I plan to work on the Tangara this evening, and I can post another update later.

Ive been inspired recently by a collection of photographs that were sent to me. These show the 86 Class cab in great detail. First there was the one from Robbo, which helped enormously, and probably started the whole thing off. It was much better than anything that I already had, and got me started on detailing the drivers side of the cab.

Recently Chris from HET sent me several photos, and asked what else I needed, so I gave him a list and he sent me several more. Many thanks to both of you. Together with photos from magazine back issues, I now have the cab covered from every possible angle, and I have been working on it whenever I get the chance.

At the moment Im a little stuck because the interior does not match up with the exterior as well as I would like. Both are true to the plans, but sometimes when you are modelling you have to throw out the plan and just build it so that it looks right. Im currently in the process of matching the two sections together. The problem is basically that there is too much distance between them, making the window sills and door trim look too wide. I need to move the interior walls closer to the outside, which is complicated at the front by the angle of the front windows. Im making slow progress.

In the picture you can see the drivers side of the master controller, showing the recess where the reverser handle will be, and also the observers controls, where the park brake and pressure gauge will be. There is also a cutout for the hotplate which will be added later.

As I mentioned before, I have been considering whether the finished 86 Class will be payware or freeware, and I have realised that until it is complete, I cant easily weigh up what has gone into it. I have a lot planned, but it all depends on how well the script comes together, and I cant even start on that until I have the model built, textured, and imported into Trainz. I will make the final decision once I have a better idea of how it is all coming together, but you should know that I am leaning towards payware for this one, especially if my plans all work out. Even so, it will be well worth the low cost.

File version: 62
Poly count: 6125 Posted by Picasa

Monday, May 08, 2006

86 Class Update

Im still thinking about a few Tangara issues, and Im having problems with the buffers, so I have done a little more on the 86 Class.

To answer Ben's question in a previous comment, you will find that the features and versions of the Tangara have been discussed earlier in this blog. (check the archives). I dont really expect people to be familiar with every word I write here, but I also dont want to repeat myself too often. You will also find a clue in my project list to the right.

To address Allans concern at my not having updated the blog in two weeks, sometimes it happens. Im finding modelling a little tough at the moment, slogging through strange problems that really shouldnt happen. For example, I have two buffer models, the only difference between them is the presence of a light on one of them (shown in the last post). One buffer model displays its textures correctly in Trainz (the one with the light) but the other doesnt. Im also still thinking about some Tangara issues, which I would like to have resolved in my mind before I continue, and then there is real life. For example, this weekend was basically a write off - a HET Workday on Saturday (I generally go once per month), and a family BBQ on the Sunday left little time for modelling, but I did manage to squeeze in an hour or two here and there.

Over the last couple of weeks, I have been very slowly piecing together the interior of the 86 Class from a couple of photos. Thanks to Robbo for one of those. The interior is still a bit blocky, but I am refining the detail and merging seperate objects together as I go. I really need some shots of the observers side of the cab, though I can fake it from the plans I have. I'd also like a shot of the Master Controller (preferrably with the reverser handle present) looking from the drivers perspective (from the seat or through the drivers side window).

Im still gathering resources, and have just obtained 5 selected backissues of Motive Power, with around 10 or so back issues of Under The Wires still to come, as well as the actual 86 Class operating manuals, which I ordered today. Im also expecting some photos from another HET member who I met on Saturday, so hopefully I will have the cab covered soon.

I cut out the cab doors from the exterior, and then spent some time cleaning up the mess made by the boolean cutting tool. I just about have the exterior back the way it was, but still have to tweak the door and window cut outs a little.

Ive spent some time thinking about the cab script. If you know the 86 Class, you will know that the throttle is not as simple as the standard 8-notches of varying speed as found in many Trainz models. The 86 Class has 5 notches and a complex procedure that must be followed using just 3 of those notches to "notch-in" and "notch-out" resistances which control the amount of power delivered to the DC motors. I believe I can write a script to emulate that, for a realistic driving experience.

I realised recently that I have not yet decided if this will be freeware or payware. I will make that decision soon. Given that extra attention will be paid to the details, since it is my favourite loco, plus the additional scripting to make it drive like an 86 Class, and the cost of research material so far, it is likely that it will be payware, but I will keep everyone posted here.

File Version: 58
Poly count: 5824